
Table of Contents
- What You’ll Need Before Integrating BIM With Construction Workflows
- Step 1: Develop Your BIM Execution Plan
- Step 2: Set Up BIM and Construction Scheduling Integration
- Step 3: Establish Your BIM Coordination Process
- Step 4: Execute BIM in the Field and Manage Real-Time Collaboration
- Step 5: Complete the BIM Model Handover Process
- Common Mistakes to Avoid When Integrating BIM
- Measuring Implementation Outcomes and ROI
- Frequently Asked Questions
Last Updated: October 14, 2026
What You’ll Need Before Integrating BIM With Construction Workflows
Building Information Modeling (BIM) integration transforms how construction teams coordinate, plan, and execute projects. But before you start integrating BIM construction workflows, you need the right foundation in place.
Start with the basics. Your team needs access to BIM software that matches your project scope and budget. You’ll also need devices in the field, tablets or smartphones, so crews can access models and updates in real time.
The real preparation happens before software arrives. Audit your current workflows. Where do communication breakdowns happen? Where do teams waste time waiting for information? Where does rework occur? These pain points will guide your BIM strategy.
You’ll also need to assess your team’s technical comfort level. If your crews are resistant to new tools, a phased rollout works better than a big-bang approach. Start small. Prove value. Then expand.
Finally, identify a BIM champion within your organization, someone who understands both construction and technology. This person becomes your internal expert and troubleshooter. Having a dedicated advocate for new workflows dramatically improves adoption rates.
Step 1: Develop Your BIM Execution Plan
A BIM execution plan is your roadmap. It defines who does what, when, and how throughout the project lifecycle.
Start by documenting your project goals. Are you focused on reducing rework? Improving coordination? Speeding up scheduling? Your goals shape everything that follows. Write them down clearly.
Next, map your stakeholders. Architects, engineers, contractors, owners, subcontractors, everyone involved needs a defined role in the BIM process.
Define your data standards. What information gets captured in the model? How detailed should it be? What naming conventions will you use? Consistency here saves hours later when teams try to find or interpret model data.
Establish your coordination schedule. How often will teams review the model for conflicts? Who attends these reviews? When do you resolve issues? A typical approach involves weekly or bi-weekly coordination meetings during active construction phases.
Finally, outline your handover process. What happens to the model after construction ends? Who maintains it? What data gets passed to operations teams? Planning this upfront prevents scrambling at project close.
Step 2: Set Up BIM and Construction Scheduling Integration
Connecting your BIM model to your construction schedule creates a powerful planning tool. This integration shows you not just what gets built, but when and in what sequence.
Start by building a detailed project schedule in your scheduling software. Break the work into logical phases: foundation, structural frame, mechanical/electrical/plumbing rough-in, finishes, and so on.
Next, link schedule activities to model elements. If your schedule says “install first-floor mechanical rough-in from week 8 to week 10,” tag those mechanical components in your BIM model.
Use this integration to run constructability reviews. Can your crews actually build the project in the sequence you’ve planned? Are there conflicts between trades? Does equipment fit through doorways?
Test your integration with a pilot phase. Run one construction sequence through the BIM-schedule workflow. Identify what works and what needs adjustment. Then refine your process before rolling it out to the full project.
Many teams discover that integrating BIM construction workflows reduces schedule delays by catching conflicts early. The investment in setup pays off quickly.
Step 3: Establish Your BIM Coordination Process
Model coordination is where BIM delivers real value. It’s where architects, engineers, and contractors align their work and catch conflicts before construction starts.
Model Coordination and Clash Detection
Model coordination is the process of comparing different design disciplines’ models to identify conflicts and overlaps before construction begins. This prevents expensive rework and field delays.
Start by establishing a regular coordination meeting schedule. Weekly meetings during design are typical. Each discipline brings their latest model. You overlay them digitally and look for clashes, places where two different systems occupy the same space.
Common clashes include:
- Mechanical ducts running through structural beams
- Electrical conduit routed through plumbing pipes
- HVAC equipment blocking access doors
- Structural columns interfering with architectural layouts
When you find a clash, document it clearly. Note what conflicts, where, and who needs to fix it. Assign responsibility immediately. Then track the resolution. Don’t move forward until conflicts are resolved.
Clash detection software automates much of this work. It scans models and flags overlapping elements. But automation isn’t perfect, you still need human review. Experienced designers often spot issues that software misses, like tight spatial relationships that will cause problems in the field even if they don’t technically overlap.
A common mistake is treating clash detection as a one-time exercise. It’s not. Run coordination reviews throughout design and again during pre-construction. New information always emerges.
Roles, Responsibilities, and Governance
Clear governance prevents confusion and conflict. Everyone needs to know who makes decisions, who approves changes, and how conflicts get resolved.
Define your BIM manager role. This person oversees model quality, coordinates between disciplines, and manages the overall BIM process. They’re not the person doing the modeling, they’re the person ensuring the modeling serves the project.
Establish approval workflows. When a discipline makes a significant change to their model, who reviews it? Who approves it? How long does approval take?
Create a model management protocol. Where is the master model stored? Who can edit it? How often do you update the shared version? How do teams access it?
Set data quality standards. What level of detail is required in the model? What information must be included? What’s optional? Poor data quality makes the model unreliable, and teams stop using it.
Finally, establish a change control process. If a design change affects the model, who approves it? How does it get communicated to other disciplines? How does it get reflected in the schedule?
Step 4: Execute BIM in the Field and Manage Real-Time Collaboration
The real test of BIM integration happens on the job site. This is where models meet reality, and communication between office and field becomes critical.
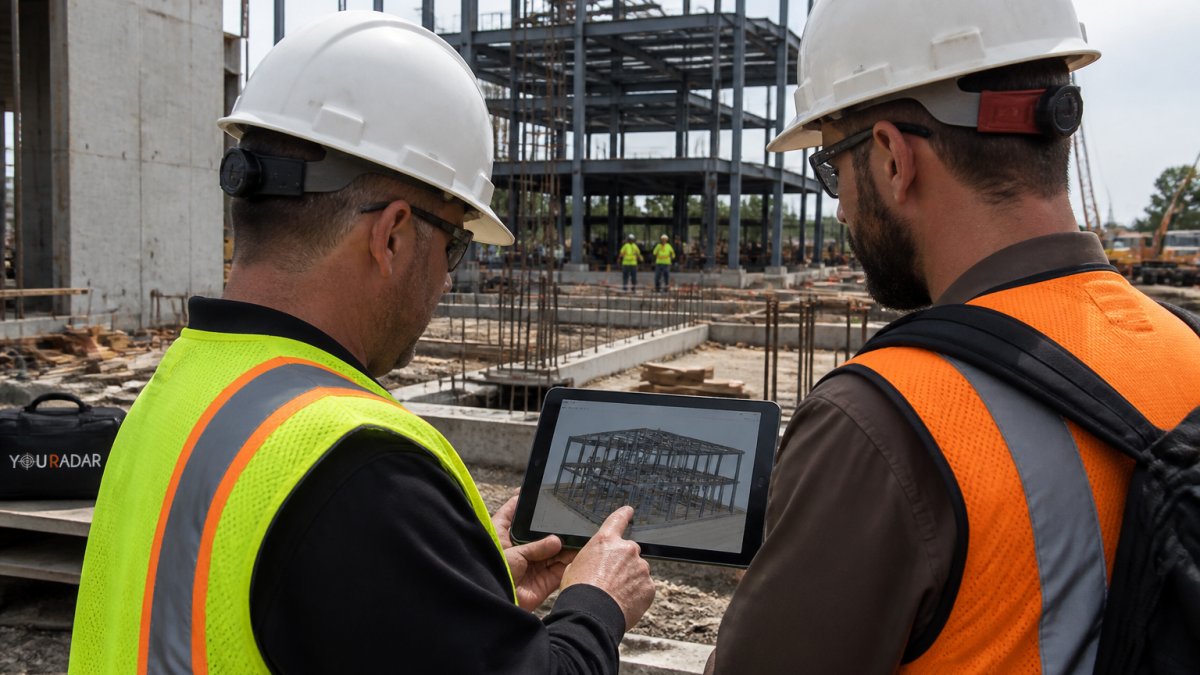
Push your model to the field. Contractors need access to current plans, details, and coordination information while they’re working. Mobile access is essential.
Establish a feedback loop. Field teams spot issues that office designers didn’t anticipate. Maybe a connection doesn’t work as drawn. Maybe equipment won’t fit.
Use real-time collaboration tools to share information.
Conduct regular site coordination meetings. Bring together the general contractor, major subcontractors, and design team representatives. Review the model together. Discuss progress. Identify upcoming conflicts before they become problems.
Track actual progress against planned progress. Update your schedule as work completes. Compare it to your 4D model. Are you ahead or behind? Are sequences working as planned?
Many field teams resist new tools at first. They’re used to working with printed plans. Mobile BIM requires a shift in thinking. Start with a small group of early adopters.
Step 5: Complete the BIM Model Handover Process
The project doesn’t end when construction finishes. The model becomes an asset for operations, maintenance, and future renovations.
Start your handover process early, during the final construction phase, not after. Work with the operations team to understand what information they need in the model.
Update the model to reflect as-built conditions. The design model shows what was planned. The as-built model shows what actually got built. These often differ.
Include operations data in the model. Equipment serial numbers, maintenance schedules, warranty information, spare parts lists, contact numbers for service providers, all of this belongs in the as-built model.
Create clear documentation. Write a guide explaining the model structure, how to access it, what information is included, and how to update it as systems change.
Transfer ownership formally. Make it clear who owns the model after handover. Who can edit it? Who maintains it? Who receives updates when systems change?
Establish a maintenance protocol. Systems change during operations. Renovations happen. The model needs to evolve with the building.
Common Mistakes to Avoid When Integrating BIM
Most BIM integration failures come from the same predictable mistakes. Avoid these and your implementation will move faster.
Starting without a clear plan. Teams jump into BIM because it sounds modern, not because they’ve identified specific problems to solve.
Expecting too much too fast. BIM integration is a process, not an event. It takes time to build team skills, refine workflows, and see results.
Ignoring field input. Office teams design the BIM process, but field teams live with it.
Treating the model as a design tool only. BIM’s real power emerges during construction and operations.
Poor data quality. Incomplete models, inconsistent naming, missing information, these kill BIM adoption. Teams can’t trust the model, so they stop using it.
Lack of training. New software requires new skills. Teams need training, practice, and support. If you deploy BIM without adequate training, adoption will be slow and frustrating.
No change management process. Design changes happen constantly. Without a clear process for updating the model and communicating changes, confusion spreads. Establish governance before you need it.
Measuring Implementation Outcomes and ROI
You invested time and money in BIM integration. How do you know if it worked?
Start by measuring what matters to your business. If your goal was reducing rework, track rework costs before and after. If it was improving schedule performance, measure schedule variance.
Common metrics include:
- Schedule performance: Are projects finishing on time? Is schedule variance decreasing?
- Rework costs: Are field change orders and rework decreasing?
- Coordination efficiency: Are coordination meetings shorter? Are fewer clashes making it to the field?
- Field productivity: Are crews spending less time waiting for information?
- Change order volume: Are design changes decreasing because conflicts are resolved earlier?
- Safety incidents: Are safety issues identified and resolved before they cause problems?
Track these metrics consistently. Measure them before BIM integration and at regular intervals after. Compare results to your baseline.
Be honest about what works and what doesn’t. Some teams discover that BIM works great for coordination but doesn’t improve scheduling. Others find the opposite. Your results guide future improvements.
Many teams find that the real value comes not from a single metric, but from a combination. Fewer clashes plus better field communication plus smoother handovers add up to significantly smoother projects.
Document your results. Share them with your team. Use them to justify continued investment in BIM and to identify where to focus next.
Integrating BIM with construction project workflows requires planning, discipline, and commitment to change. The payoff comes from better coordination, fewer field conflicts, and smoother handovers.
Frequently Asked Questions
How do you integrate BIM into a construction project workflow?
Integrating BIM with construction project workflows starts with creating a BIM execution plan that defines roles, data standards, and collaboration protocols. Next, synchronize your BIM model with your construction schedule so timeline changes update the model automatically. Establish a coordination process where architects, engineers, and contractors review the model together to catch conflicts early. Finally, deploy the model to field teams via mobile devices so they can access real-time information on site. This integration reduces rework, improves communication, and keeps all stakeholders aligned throughout design, pre-construction, construction, and project delivery phases.
What should a BIM execution plan include?
A BIM execution plan outlines how your project team will create, manage, and share BIM data. It should define who owns each model element, what software and file formats you’ll use, how often the model updates, what information each phase requires (design, pre-construction, construction, delivery), and how teams will collaborate. Include details on model coordination protocols, clash detection procedures, data quality standards, and how the model will be handed over to operations. A clear execution plan prevents confusion, reduces delays, and ensures everyone knows their responsibilities from day one.
How can BIM models be connected to construction schedules?
BIM and construction scheduling integration links your 3D model to your project timeline, creating what’s called 4D BIM. Each model component gets assigned to specific construction phases or dates. When your schedule changes, the model updates to reflect the new sequence. This helps you visualize how construction flows over time, identify resource conflicts early, and optimize construction sequencing. For trades teams managing multiple jobs, this integration shows which materials arrive when, which crews work where, and what potential bottlenecks exist, all before crews arrive on site.
What happens during the BIM model handover process?
The BIM model handover process transfers the completed model from the construction team to operations and maintenance staff. This includes cleaning up the model to remove construction-phase data, adding operational information (maintenance schedules, equipment details, warranties), and converting it into a format operations teams can use. Handover documentation includes model metadata, access permissions, and training for facilities teams. A proper handover ensures your model continues to add value after construction ends, supporting maintenance planning, space management, and future renovations. Without clear handover protocols, teams lose the investment made in the model during design and construction.