Table of Contents
- Step 1: Plan Pre-Construction with BIM Coordination and Shop Drawings
- Step 2: Standardize Installation with HVAC Quality Control Checklists
- Step 3: Improve Field-to-Office Communication Workflows
- Step 4: Use Field Service Management Software for HVAC to Track and Prevent Rework
- Step 5: Monitor HVAC First-Time Fix Rate to Measure Rework Reduction
- Step 6: Address Specific HVAC Equipment Constraints and Accessibility
- Step 7: Build a Post-Installation Feedback Loop for Continuous Improvement
- Cost-Benefit Analysis: The True Cost of Field Rework in HVAC
- Frequently Asked Questions
Last Updated: September 16, 2026
Step 1: Plan Pre-Construction with BIM Coordination and Shop Drawings
Field rework in HVAC starts when design leaves the office without a constructability review and the crew finds ductwork routing conflicting with a structural beam on site. Treating pre-construction planning as the first line of defense, not a formality, reduces that risk.
Why Shop Drawings and Clash Detection Matter
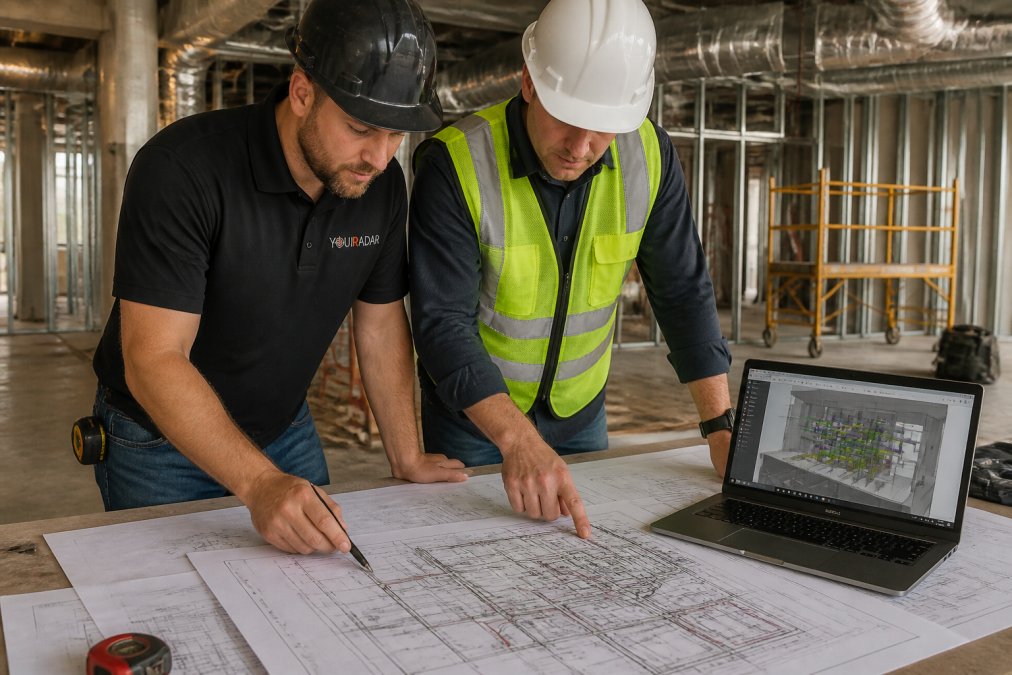
Shop drawings are the contractor’s dimensioned interpretation of the engineer’s design intent, showing how ductwork, piping, and equipment will be installed in the actual space. Clash detection runs the 3D model against structural, electrical, and plumbing models to find conflicts before installation.
HVAC-Specific Coordination Mechanics Competitors Skip
Generic BIM advice stops at “run clash detection.” HVAC coordination requires extra moves most content never mentions:
- Set a level of development (LOD) target for mechanical models. LOD 350 is the common threshold for trade coordination because it includes connection points, hangers, and supports. Lower levels produce false negatives, clashes that exist in the field but not the model.
- Coordinate penetrations and sleeves before structural pour. Duct and pipe penetrations through rated assemblies need firestop detailing and sleeve locations locked in before concrete is placed. A missed sleeve forces core drilling through finished structure, one of the most expensive rework events.
- Prioritize duct routing by pressure class and velocity. High-velocity mains have tighter fitting and transition requirements than low-pressure branches. Routing mains first, then branches, then terminals prevents the cascade of re-fits that happens when a branch precedes its parent trunk.
- Reserve service and maintenance zones in the model, not just physical clearances. A model that fits a unit but omits the door swing, filter pull, or coil pull path passes clash detection and still fails in service.
- Run a constructability review with the installing foreman, not just the modeler. The person who will hang the duct is the best source of “this will never fit” feedback. A 30-minute review before fabrication routinely catches issues a pure software clash run misses.
The most common pre-construction mistake is treating shop drawings as a rubber-stamp exercise. When drawings go out without a clash detection pass, ductwork routing conflicts surface during installation, and every one of those conflicts becomes a change order with a schedule impact.
The Feedback Loop Back into Pre-Construction
Pre-construction planning is not a one-way street. The most effective HVAC contractors log every field-discovered conflict with a photo and cause code, then review that log at the next project’s coordination kickoff. Over a few projects, the same clash categories, say, duct mains versus sprinkler mains in a corridor ceiling, recur, and the team learns to resolve them in the model before they reach the field.
Step 2: Standardize Installation with HVAC Quality Control Checklists
HVAC installation quality control checklists turn tribal knowledge into a repeatable standard. When every technician follows the same sequence and verification points, efficiency rises and callbacks fall.
- Equipment clearance and serviceability dimensions verified against the technical specifications
- Ductwork routing confirmed against the coordinated model before fabrication
- Support spacing, seismic restraint, and penetration sealing
- Refrigerant line sizing, insulation continuity, and pressure test records
- Electrical disconnect location and control wiring terminations
- Final airflow verification and as-built documentation captured on site
What to Include in a Field-Ready Checklist
Every item should have a pass/fail verification step and a photo requirement. If a technician cannot document it, it did not happen. A phone-based checklist that forces a photo at each step closes the gap between what the office assumes happened and what actually happened.
Step 3: Improve Field-to-Office Communication Workflows
Rework thrives in communication gaps. A site condition that never reaches the office becomes a surprise invoice; a design change that never reaches the field becomes demolition. The fix is a defined workflow with a single channel: site issues logged, photographed, and routed to the person who can resolve them, with a timestamp and status. Paper notes and group texts are where change orders go to die.
Set a rule that any site condition affecting installation gets documented within the same shift. Rework that gets caught before the next trade mobilizes costs a fraction of rework discovered a week later.
Step 4: Use Field Service Management Software for HVAC to Track and Prevent Rework
Field service management software for HVAC gives you the tracking layer that makes rework visible and preventable. Without it, rework is anecdotal; with it, you see which crews, equipment types, and project phases generate the most repeat visits.
Mobile-First Documentation and Real-Time Dispatching
Real-time dispatching matters because rework often means a return trip. When a dispatcher can see every technician on a map and reassign the nearest qualified tech, a callback becomes a short detour instead of a lost afternoon. Mobile-first documentation captures the as-built record at installation, not from memory weeks later.
| Rework Cause | Preventative Measure | Where It Pays Off |
|---|---|---|
| Clash discovered on site | BIM clash detection before fabrication | Fewer change orders |
| Missing equipment clearance | Checklist with photo verification | No re-installation |
| Site issue not reported | Timestamped field-to-office workflow | Faster resolution |
| Return trip scheduling | Real-time dispatch mapping | Recovered billable hours |
Step 5: Monitor HVAC First-Time Fix Rate to Measure Rework Reduction
HVAC first-time fix rate is the share of service calls resolved on the first visit without a return trip, the most useful metric for tracking whether your rework reduction efforts are working.
Step 6: Address Specific HVAC Equipment Constraints and Accessibility
Every equipment category carries its own installation constraints, and ignoring them generates rework. Here is what drives rework on each major HVAC category.
Rooftop Units (RTUs)
- Structural coordination: Confirm RTU curb dimensions and point loads against the structural drawings before the roof is framed. A curb sized for the wrong unit means cutting and re-framing the roof opening.
- Crane and rigging access: Confirm the crane pick radius, boom height, and staging area against site conditions. A unit that cannot be lifted into place becomes a disassembly-and-reassembly job.
- Service clearance: Manufacturers publish minimum clearances for condenser coil access, filter change, and economizer service, typically 600 mm to 1,200 mm on the access side, but the exact figure is unit-specific and must be read from the installation manual, not assumed.
- Roof curb and duct connections: Verify duct connection locations and sizes against the curb drawing. A mismatch here is a fabrication rework, not a field fix.
VRF and Split Systems
- Refrigerant line routing and length limits: VRF systems have maximum equivalent pipe lengths and height differentials between indoor and outdoor units. Exceeding them degrades capacity and can void the warranty. Route lines in the model and verify against the manufacturer’s limits before fabrication.
- Branch selector and joint accessibility: These components need service access. Burying a branch joint above a hard ceiling is a rework event waiting to happen.
- Condensate drainage slope: Gravity condensate lines need continuous slope to the drain. A line that runs flat or back-pitches will produce water damage callbacks, not just a rework visit.
Boilers and Chillers
- Rigging path and housekeeping pad: Confirm the rigging path from delivery point to final location, including door widths, ceiling heights, and turn radii. A chiller that cannot be moved into the mechanical room is a major rework event.
- Ventilation and combustion air: Boilers need combustion air and flue routing coordinated with the building envelope. A flue termination that conflicts with a window or intake is a code and rework issue.
- Service and tube-pull clearance: Chillers need tube-pull space at the end of the bundle. This dimension is in the manufacturer’s submittal and is frequently omitted from architectural coordination.
Ductwork Routing and Accessibility
- Above-ceiling coordination: Duct mains, sprinkler mains, cable tray, and lighting all compete for the same ceiling void. Establish a priority order (typically gravity systems first, then duct, then electrical) and hold it in the model.
- Access doors and volume dampers: Every damper and fire damper needs an access door. A damper installed without access is a code violation and a guaranteed rework item at commissioning.
- Seismic restraint and support spacing: Support spacing is governed by duct size, weight, and the applicable building code. Confirm the spacing schedule before installation, not after inspection.
Serviceability is a design decision, not an installation detail. If a technician cannot reach a component with tools in hand, the installation will generate rework for the life of the equipment. The cheapest time to fix a clearance problem is in the model, not on the roof.
A Practical Field Check Before Every Install
Before any equipment is set or duct hung, the installing technician should verify three things against the coordinated model and the manufacturer’s submittal: physical fit, service access path, and connection points. If any does not match, the issue gets logged and routed before installation proceeds. That habit, verify before you fix, separates a clean finish from a punch list full of rework.
Step 7: Build a Post-Installation Feedback Loop for Continuous Improvement
Most HVAC contractors close out a project and move on. Those that reduce rework over time capture what went wrong and feed it into the next pre-construction cycle.
Cost-Benefit Analysis: The True Cost of Field Rework in HVAC
Rework prevention pays for itself, but the case is easier to make when you count the full cost of a single rework event: direct labor, the return trip, replacement material, schedule slip, administrative time on the change order, and margin lost to unbilled coordination.
Canadian Construction Association resources on project delivery and collaboration
Frequently Asked Questions
What are the primary causes of field rework in HVAC?
The main causes are incomplete pre-construction planning, unclear shop drawings, poor communication between design and field teams, and missing quality checks. When ductwork routing or equipment clearance is not verified before installation, technicians often discover clashes on site. Change orders and rushed schedules add pressure. Standardizing installation processes and using digital tools to share real-time updates can cut these issues significantly.
How does poor communication between office and field lead to rework?
When the office does not relay design changes or site conditions promptly, field technicians install based on outdated information. This leads to clashes, incorrect equipment placement, and rework. Using a mobile-first platform with instant messaging, photo sharing, and task updates keeps everyone aligned. A dispatcher can see real-time progress and flag issues before they become costly mistakes.
What role do HVAC installation quality control checklists play in reducing rework?
Checklists ensure every step, from equipment clearance to duct sealing, is verified before sign-off. They create a consistent standard across all technicians, catching omissions early. A digital checklist tied to a field service management software for HVAC can trigger follow-up tasks and document as-built conditions. This reduces callbacks and improves first-time fix rates.
How can I track HVAC first-time fix rate to measure rework reduction?
Track the percentage of jobs completed correctly on the first visit without a return trip. Use field service management software to log each service call, parts used, and whether a follow-up was needed. Review the data weekly to spot patterns, such as a specific technician or equipment type with lower rates. Improving this metric directly reduces rework and boosts profitability.